Posts Tagged ‘wordpress’

WordPress Plugin: ListPipe Content Generator

Tuesday, March 20th, 2012

Download our WordPress Plugin.

We get a lot of questions regarding our WordPress plugin. Mostly 'Where can I get it?', but there are a few other questions I would like to address in this quick post. For the record, the WordPress plugin is officially called the ListPipe Content Generator.

First, it is important to know that we recommend you install the plugin BEFORE you create your account.

The reason we want you to have the plugin installed and activated before you start your account is because we will attempt to push your initial content as part of the account creation process. If you do not have the plugin installed, the push will fail and you will not receive your first article(s).

This is not necessarily a huge problem; you will begin to receive content from our service within a week of installing and activating the plugin, but if you can get it done before you create your account you will receive content within the first hour.

Where Can I Get It?

There are three ways you can get the WordPress Plugin:

  1. The easiest place to get the plugin is within your own WordPress installation. Simply go to the 'Plugins' section of your WordPress Dashboard (on the left, about in the middle) and click 'Add New'. Perform a search for 'ListPipe Content Generator' to find the plugin, and then Install and Activate the plugin. Easy. Note that this only works for sites that have automation turned on, which most do.
  2. You can always download the ListPipe Content Generator plugin directly from WordPress.org, where our plugin resides and is made available to all WordPress users. To download from WordPress, go to: http://wordpress.org/extend/plugins/listpipe/ . Once you have downloaded the plugin, copy it to your Plugins folder in your site files (typically in root/wp-content/plugins - you will need an FTP client to do this) and then login to your WordPress site and visit your Plugins section to Activate the plugin.
  3. The ListPipe Content Generator plugin is available in your Account Home Toolbox (Control Panel). The problem with getting it from here is that it requires you to have an account, and we recommend that you install the plugin before you create your account. The reason we put it in the Toolbox is so that you have ready access to it if you should ever need it in the future when revising your site or for updates.

When Should I Install The WordPress Plugin?

As already addressed; we recommend installing and activating the plugin BEFORE you start your account.

The reason for this is that at the end of the sign up process we will attempt to deliver your first article. If the plugin is not installed and activated, we will not be able to deliver your initial content.

If you miss your initial content (we call it 'Startup Content'), you have two choices: You can simply install and activate the plugin and wait for your next week's content to arrive (should be there in the next week), or you can create a Support Ticket and ask that we push your Startup Content again.

Make sure that you have installed and activated the ListPipe Content Generator plugin on your site before you ask us to re-push your Startup Content.

What Does The Plugin Do?

The ListPipe Content Generator receives content from our service in a secure 'handshake' that lasts only a couple seconds.

The plugin basically acts as a 'catcher', just like a catcher in baseball; It simply waits for a pitch, and only responds when it is called. It doesn't initiate any of it's own processes; it only responds when called. It simply waits for our server to contact it and receives the new content in a secure 'handshake'.

During the secure 'handshake', our server communicates with your plugin and confirms your identity using a very secure and private random 'key'. The key is only good for a couple of seconds, and expires as soon as the transaction is complete. Once your identity is confirmed, our server delivers the content to your site with the permission of the plugin, and then the 'handshake' is closed. The plugin then simply waits for another call from our service. The plugin cannot receive a call from any other service because it uses a proprietary private key to establish the handshake.

Do I Have To Configure The Plugin?

No, You do not have to configure the plugin. There are no passwords to enter, and no settings to adjust; we do everything from within your account settings on our server. The plugin simply listens for a call, and uses your own URL to help us make a positive identification.

How Do I Remove The Plugin

If you should end the service with us, simply delete the plugin from your Plugins folder (typically in root/wp-content/plugins - you will need an FTP client to do this). That's all. You can also delete the plugin from within your WordPress Dashboard by going to Plugins and deactivating and then deleting the ListPipe Content Generator plugin. There is nothing more to do than this; deleting the plugin fully removes it from your system.

How To Add A Post To Your Blog

Tuesday, July 27th, 2010

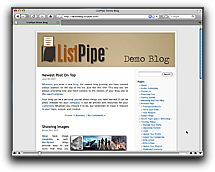
For those of you anxious to get some content into your site, here’s look at how to Add a Post.

The first thing you'll need to do is login. I’ve already covered the login process in a previous video, so I’ll assume you are starting from your WordPress Dashboard.

Once you are in your WordPress Dashboard, there are a couple of ways to start a new post. At the top is a handy button that says ‘New Post’. Clicking this will open a new post window and you are ready to begin adding your content. Note that this button is contextual, so depending on where you are in the WordPress Control Panel, this button may say something different. You can always get to ‘New Post’ by clicking on the arrow and finding ‘New Post’ in the dropdown menu.

You can also start a new post by clicking ‘Posts’ on the left navigation and then clicking ‘Add New’ in the sub menu that appears below the ‘Posts’ heading.

I am now in the ‘Add New Post’ window and am ready to add my content. I’ll keep it simple on this time through and show you some advanced features later on.

The first thing I’ll do is add the title of my post here in the box at the top. I am calling this post ‘Latest Post On Top’.

Next, I’ll add the body of my post in the text box just below the title. You can type your post in here from scratch, or simply copy and paste from your favorite word processor.

Note that you can open what WordPress calls ‘The Kitchen Sink’ by clicking this button in the tool bar that has all the little squares on it. The Kitchen Sink includes import tools for pasting plain text or from Microsoft Word. The import tools are important to use, especially when pasting from Microsoft Word because they will interpret a lot of hidden code that is included in your text and thereby avoiding a formatting nightmare.

I’m going to import from a text file, so I’ll use the text import button to show you how it works; I’ll click the button in the toolbar that has the clipboard and the ‘t’ on it, paste my text into the resulting window, and then click ‘Insert’. This is the safest way to import text into your post.

For the most part, we are finished. However there are two other things you should do with every post, so I’ll show those to you now as part of this lesson.

On the right you have two sections of the Post window; one called Categories, and the other called Post Tags.

Categories are important to assign because they will help you keep your site organized, and can be helpful to your readers as they navigate your content. I recommend assigning a Category to every post. Simply select from one of your preset Categories, or add a new Category here at the bottom of the Category box.

The other thing you should do for every post is add Post Tags. Post Tags are another way to organize your content, and are a helpful tool for your readers as well as an important way to let the search engines know what your key topics are for each post. Simply type a few keywords from your post into this box, separating them with a comma, and then select ‘Add’.

At any point in this process I can save my work as a draft by clicking the ‘Save Draft’ button here at the top of the form. When I ‘Save Draft’, I am saving my work into the Control Panel. After I ‘Save Draft’, I can walk away from my computer or even log out of my WordPress Control Panel and my draft will be saved and ready for me when I come back to work on it.

Content doesn’t go live to your blog until you select the ‘Publish’ button, here on the right. Once I select ‘Publish’, my post will be saved and will appear on my blog for everyone to see.

There are some advanced features to learn after this, but this is the basics of how to publish a new post to your WordPress blog.

New WordPress Training Videos Posted

Thursday, September 11th, 2008

We recently posted an all new collection of WordPress training videos for WordPress bloggers. Learn how to do the basics in WordPress.

You can view our recommended top ten wordpress training videos here. Just click on the headline for each numbered item to go to the video page.

You can also dive straight into our ListPipe WordPress video library from this page.

Our how-to videos are presented in high quality Quicktime on the site, and are available on YouTube if you want to see them in a smaller version. When you get to YouTube, do a search for 'ListPipe' and 'Wordpress' to find all the videos. There are currently 13 of them, covering topics such as logging in, and inserting images.

Each video on our demo blog includes written instructions on how to complete the task in the latest WordPress version. Each video is designed to teach you a specific task in between two and three minutes. For those of you new to WordPress blogging, this is an excellent way to become familiar with the basics of your WordPress system.

Take a look and let us know what you think. Enjoy!