Archive for the ‘ListPipe News’ Category

Videos Not Playing In IE

Friday, June 29th, 2012

We received a few queries regarding videos not playing in Microsoft IE.

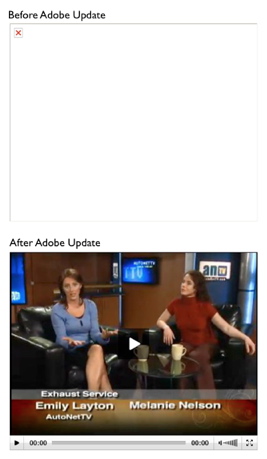
If you are seeing a blank box or a 'broken icon' image where your video should be, it is likely that you are having trouble with your Flash player in IE. This is a common issue, and it is relatively easy to fix. All you need to do is update your Adobe Flash Player.

If you are having issues with video, please update Adobe Flash Player in your IE.

This issue appears to be exclusive to IE. If you continue to have problems, we highly recommend that you update to a modern browser including Firefox, Chrome, or Safari. -These browsers are designed with a more modern open standard and are compatible with more features of more sites.

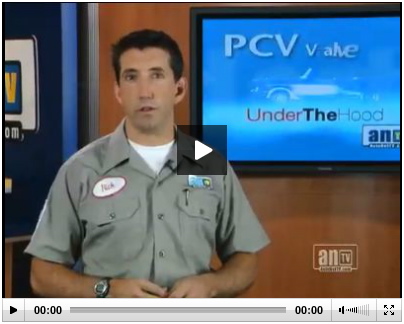
I have included an example, there on the right. The top image is what the video looks like in IE when you do not have the latest Adobe Flash Player installed. The bottom image is the same video, immediately after the install. -Works like a charm!


Ways To Connect With ListPipe

Tuesday, April 24th, 2012

ListPipe offers at least five ways to connect with our service. Whether you sign up for one of our internally hosted accounts or have your own site, we can get you connected with an array of connection technologies that are easy to install and require no management.

1. Internally hosted is our standard, out-of-the-box solution for those who don't have a site or want a second one that points to their first one. This is the easiest solution and takes only a few minutes to set up and be running. Our internally hosted sites are built on the WordPress framework and provide a host of management options.

2. WordPress plugin for those who have an external WordPress account and want our content, only. Our WordPress plugin is easy to install and takes only a minute or two; literally. This is an easy way to connect with ListPipe and allows you to maintain your own site by your own rules while receiving great custom content from our service.

3. RelayPipe™ for advanced integration with PHP websites. RelayPipe is a web service based on REST that allows you to create a new page with any of our various code samples and receive our content to that page. While we have made this solution fairly easy to implement, we recommend this solution for webmasters, only, because a knowledge of CSS and basic coding is highly recommended. (-That said, we have had newbies install this successfully, so if you are technically inclined and patient, it is possible.)

4. Domain Mapping is available for those who have an internally hosted account but want it to appear as a seamless extension of their existing site/domain. Once you have created your internally hosted ListPipe account, you can map a domain or sub-domain to the account using a handy took in our Control Panel. It only takes a few minutes to do, and will make your ListPipe site appear in the search engines as a natural extension of your existing domain. We highly recommend this if you have an internally hosted site.

5. An iFrame can be used to present an internally hosted site in a window on your existing page. This is a simple way to incorporate the blog content onto a site, but offers no additional SEO value than the externally hosted site already affords. Using an iFrame adds the convenience of showing all your content within a single site, but iFrames can be a little cumbersome. Some integrations we have seen have been done really well, others not so much. Your results will vary depending on your skill and the theme of your existing site.

Google Analytics In ListPipe

Monday, March 26th, 2012

We are pleased to announce that our ListPipe Control Panel now includes basic Google Analytics for each of our standard accounts.

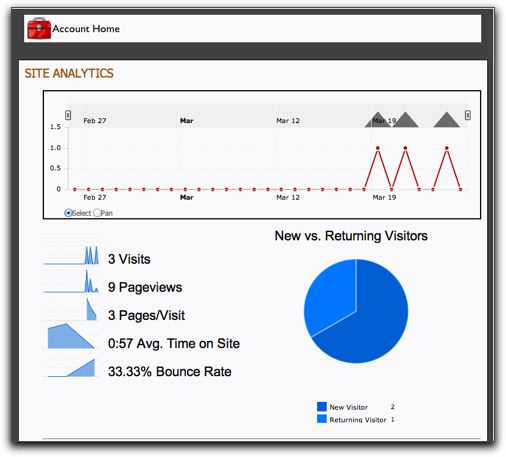
It has been a long time coming, but we have completed phase 1 of this project, allowing each standard account to view basic analytics about their account including daily and accumulative visitation statistics for the last 30 days, pageviews, average time on the site and bounce rate.

We will certainly grow from this point, and are thrilled that we now have a method for users to measure basic performance on their site so they can track the effectiveness of various strategies and tactics for marketing their site. Users can watch the traffic and holding power of their site, and can measure content sharing and social media marketing  strategies to determine which work best for their business marketing audience.

Our analytics page includes a Legend, explaining each graph as well as suggestions for increasing traffic and basic performance.

To access your Google Analytics for your ListPipe account, simply login to your account home and click the new Analytics icon.

Currently, our analytics page will only show data for internally hosted accounts that are not mapped to an external domain (Domain Mapping). We can not currently show analytics for external accounts or for RelayPipe accounts. If you have your own site, you can incorporate Google Analytics without too much trouble by starting your own Google account and activating the Google Analytics feature. It only takes a few minutes and is free.


Why Did My Videos Stop Working?

Friday, March 9th, 2012

A Broken Video Window

We have received a few calls asking why videos seem to stop working.

For a few of our customers, the video portion of their content has been mysteriously replaced by a large black rectangle that won't display any video. The example to the right is what you might see on your site if your videos seem to have flown the coop.

If you have this issue, you might have noticed this after the content has been edited in some way, even though the video itself hasn't been modified. It might have occurred after you copied the content, and then re-pasted it exactly as it was with no modifications.

Why did your videos stop working?

The answer has to do with 'how' you edited or copied your content.

In your WordPress Editing Window you will notice two tabs on the top right corner of the editing window; one labeled 'Visual' and the other labeled 'HTML'.

Editing Window Showing Tabs At Upper Right

These are very important, and here is why; we publish your video content in an 'HTML wrapper', meaning that in your content you have a paragraph of HTML 'code' that includes instructions on where your browser can find the video file, and where to connect to a video player. This code is only available to you in the HTML tab, and is 'invisible' to you in the Visual tab.

When you move, copy or paste content from your site using the Visual Tab, you are copying a 'display only' version of the content, which does not include the HTML code for the video. If you paste the Visual content into another site, or onto another page, or in another applications such as a word processor, you are saving a copy of your content without the video code. When you paste it back, the video will be broken.

Video Code Example

While it seems you have not 'touched' the video portion of your site, in effect you have actually removed it by doing a copy and past.

The Solution

To solve this problem, make your edits in the HTML tab, or copy from the HTML tab to make sure you are getting all the video information. Small edits to your text can be safely performed in the Visual tab, however there are some cases where you may overwrite your video code without realizing it. For this reason we recommend editing in or copying from in the HTML tab, only.

A Functional Video Window

Editing in the HTML tab is really no different than editing in the Visual tab, but allows you to clearly see where the code elements are so you can avoid them or include them as you need to. Safely editing in the HTML tab will preserve your video and save you additional trouble.

NOTE: You should never have to make edits to the video code in any of your posts. Editing your video code (usually at the top of the post) is risky if you are unfamiliar with HTML, and can result in you losing access to the video in your post. Also, watch out for image code within your article, and avoid editing anything that has special characters or appears to be a code reference.

If you have missing videos on your site that you need help with, please create a new support ticket with a request for help with broken video.

Good luck!


Local Search Marketing Works

Tuesday, March 6th, 2012

ListPipe specializes in local search marketing with Powerful Custom Content written just for you.

I ran across a couple of very interesting statistics that indicate local search is not only gaining ground, but is a valuable method for marketing your business online.

  • Over 80%* of local searches are done online
  • Over 50%** of local searches result in a purchase
  • Millions use local search everyday

*Google   **eMarketer - October, 2009

RelayPipe and Facebook Connections – Solved

Wednesday, February 15th, 2012

We recently added a new feature to our ListPipe Control Panel for our RelayPipe™ users; the ability to specify the page to which your Facebook posts link.

This has been an often-requested feature from our RelayPipe users because until now we had no way of knowing which specific page to link back to, so we were simply sending all links back to the Home page of the user's website. This caused some confusion, and raised the question about whether we could provide a method for specifying a different page for posts to return to. Yes we can!

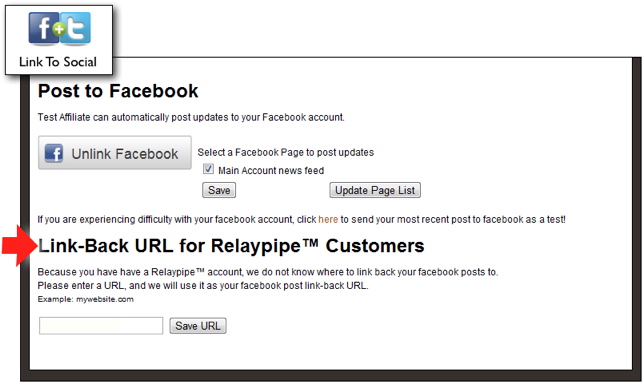
RelayPipe users can now enter the Link to Social section of the Control Panel Toolbox and enter the URL to which you would like us to link all your Facebook posts.

RelayPipe users are customers who have elected to have our content published directly to their existing site using a web service. Because RelayPipe allows for a wide range of custom implementations, it is impossible for us to know which page (URL) contains the posts, or even that the customer prefers that we link back to THAT specific page.

With this new feature, RelayPipe users can specify the exact page to link back to from Facebook posts; it can be your Home page, your Blog page, or any other page you specify.

If you are a RelayPipe user, please login to your account and click on the Link to Social button in the middle of the Control Panel Toolbox to get to the new feature. You will find it at the bottom of the page, just below the Facebook Link section.

NOTE: If you are NOT a RelayPipe user, you will not see this new feature.

Forget Your Password?

Wednesday, October 5th, 2011

With more and more people calling in to say 'I forgot my password', we decided it was about time we enabled a lookup password feature on our login page.

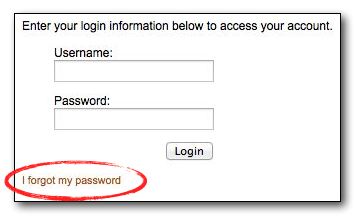
If you have lost your password, simply visit our login page (up there in the top right corner) and locate the new 'I forgot my password' link at the bottom of the login screen. Click the link and enter your username and your password will be emailed to the email address we have on record for that account.

Easy!

Adding Video To Your ListPipe Blog

Tuesday, February 1st, 2011

Adding video to your blog is a great way to deliver a message and adds to the entertainment value of your site. The result can be more interest and longer stays.

We encourage you to add video from YouTube.com for several reasons, not the least of which are that you can take advantage of their outstanding video features, ease of use, and access to a global community of You-Tubers who can engage with your videos from computers, phones and tablets.

There are several ways to add a video to your blog. Here is a quick overview of the easier ones:

Quicktags

The easiest way to add video to your blog is via a plugin that we include called Viper's Video Quicktags.

When you log into your blog and create a new post, you will notice a small icon in the editing toolbar for 'YouTube'. Simply place your cursor in your text where you want it to insert, and click the YouTube button.

You will be asked to enter the URL for the video. Click 'OK' and you're finished!

Embed

YouTube provides a handy embed code at the bottom of each of their videos. This embed code is customizable, and allows you to easily embed a video onto your blog.

Just visit your favorite video on YouTube and click the 'Embed' button located under the video. A box will open below the button that includes options for customizing your video including colors, sizes, and the ability to include related videos.

When you are finished selecting your custom options, simply copy the embed code from the box and paste it into the HTML editing window in your blog.

WAIT! You're not finished yet; before you change to the Visual window to continue editing, or save, add paragraph tags to the embed code. This will make the embed code compatible with your WordPress blog and save you the trouble of learning the hard way that WordPress doesn't take kindly to some types of code (for your safety).

Adding paragraph tags is simple; just add one of these to the front of the embed code: '<p>', and one of these to the end of the embed code: '</p>' (do not include the single quotes; those are mine).

Adding these tags is a known workaround to an issue regarding an editor that is included within WordPress called TinyMCE. To learn more about this workaround, visit this WordPress ticket regarding the workaround.

Good luck!